Overlooked hazards are more than missed checklist items. They can put your team at risk, invite costly OSHA penalties, and bring jobsites to a halt.
Whether it’s a stop-work order or an injury that could’ve been avoided, the consequences of skipping hazard assessments can ripple across your schedule, your budget, and your reputation.
Too often, hazard assessments are treated as background paperwork, delegated without context, rushed through without field insight, or, worse, copied over from past jobs. That’s when exposure mounts. Crews improvise around hazards that no one formally flagged, and safety blind spots stay hidden until there’s a close call or an actual incident.
The Occupational Safety and Health Administration (OSHA) doesn’t just prefer that you assess and control hazards; It legally requires it. But more than compliance, the real value of a jobsite hazard assessment lies in proactive prevention. The right approach helps your safety program do what it’s meant to and ensures you’re ahead of risk, not reacting to it.
This blog will explore how jobsite hazard assessments help prevent incidents before they affect safety, compliance, and productivity.
What Is a Jobsite Hazard Assessment?
A jobsite hazard assessment is a focused, structured method for identifying potential dangers in your operations before they lead to injuries, illnesses, or regulatory violations.
Instead of general walkthroughs, a proper hazard assessment analyzes how specific tasks interact with particular environments, tools, and materials. You’re not just observing; you’re tracing hazards back to their sources and planning controls that fit the real work being done.
When you assess a jobsite thoroughly, you can uncover a wide range of hazard types, including:
| Hazard Category | Examples |
| Physical | Slips, trips, lifting strains, heat stress, high noise, flying debris |
| Chemical | Solvent vapors, dust inhalation, corrosive spills, flammable gases |
| Biological | Mold, bacteria, viruses, contaminated fluids |
| Radiological | Laser exposure, ionizing and non-ionizing radiation |
| Mechanical/Energy | Rotating machinery, hydraulic pressure, stored energy |
The OSHA ties these assessments to specific regulations, including:
- 29 CFR 1910.132 (related to personal protective equipment)
- 29 CFR 1910.120 (hazardous waste operations and emergency response)
- 29 CFR 1910 Subpart J (general environmental controls)
In short, hazard assessments aren’t theoretical. They form the backbone of compliance and influence everything from training and personal protective equipment (PPE) to your ability to defend your safety protocol in an audit or investigation.
Why Jobsite Hazard Assessments Matter for Compliance and Safety Outcomes
Cut corners on hazard assessments and your crew ends up unprotected, your program becomes unfocused, and your liability increases. For safety professionals and project leads, this process is non-negotiable for four critical reasons:
1. You’re legally required to do it. Under the General Duty Clause, the OSHA expects you to anticipate and control known hazards. You can’t defend what you didn’t assess.
2. A missed hazard undermines every safety control. If the risk isn’t identified, the PPE won’t match it, the training misses the mark, and procedures may be useless or unsafe in practice.
3. Assessments keep your program job-specific. If your hazard strategy is too generic, your controls won’t reflect the actual exposures your teams face, especially in complex or high-risk environments.
4. It replaces assumptions with data. Crews often estimate hazard levels casually based on experience. Formal evaluations bring evidence and alignment to the conversation.
These assessments protect your workers from the hazards that lead to the OSHA’s top citations: fall hazards, unguarded energy sources, inadequate respiratory protection, and the misuse of PPE.
The Standard Process for Conducting a Jobsite Hazard Assessment
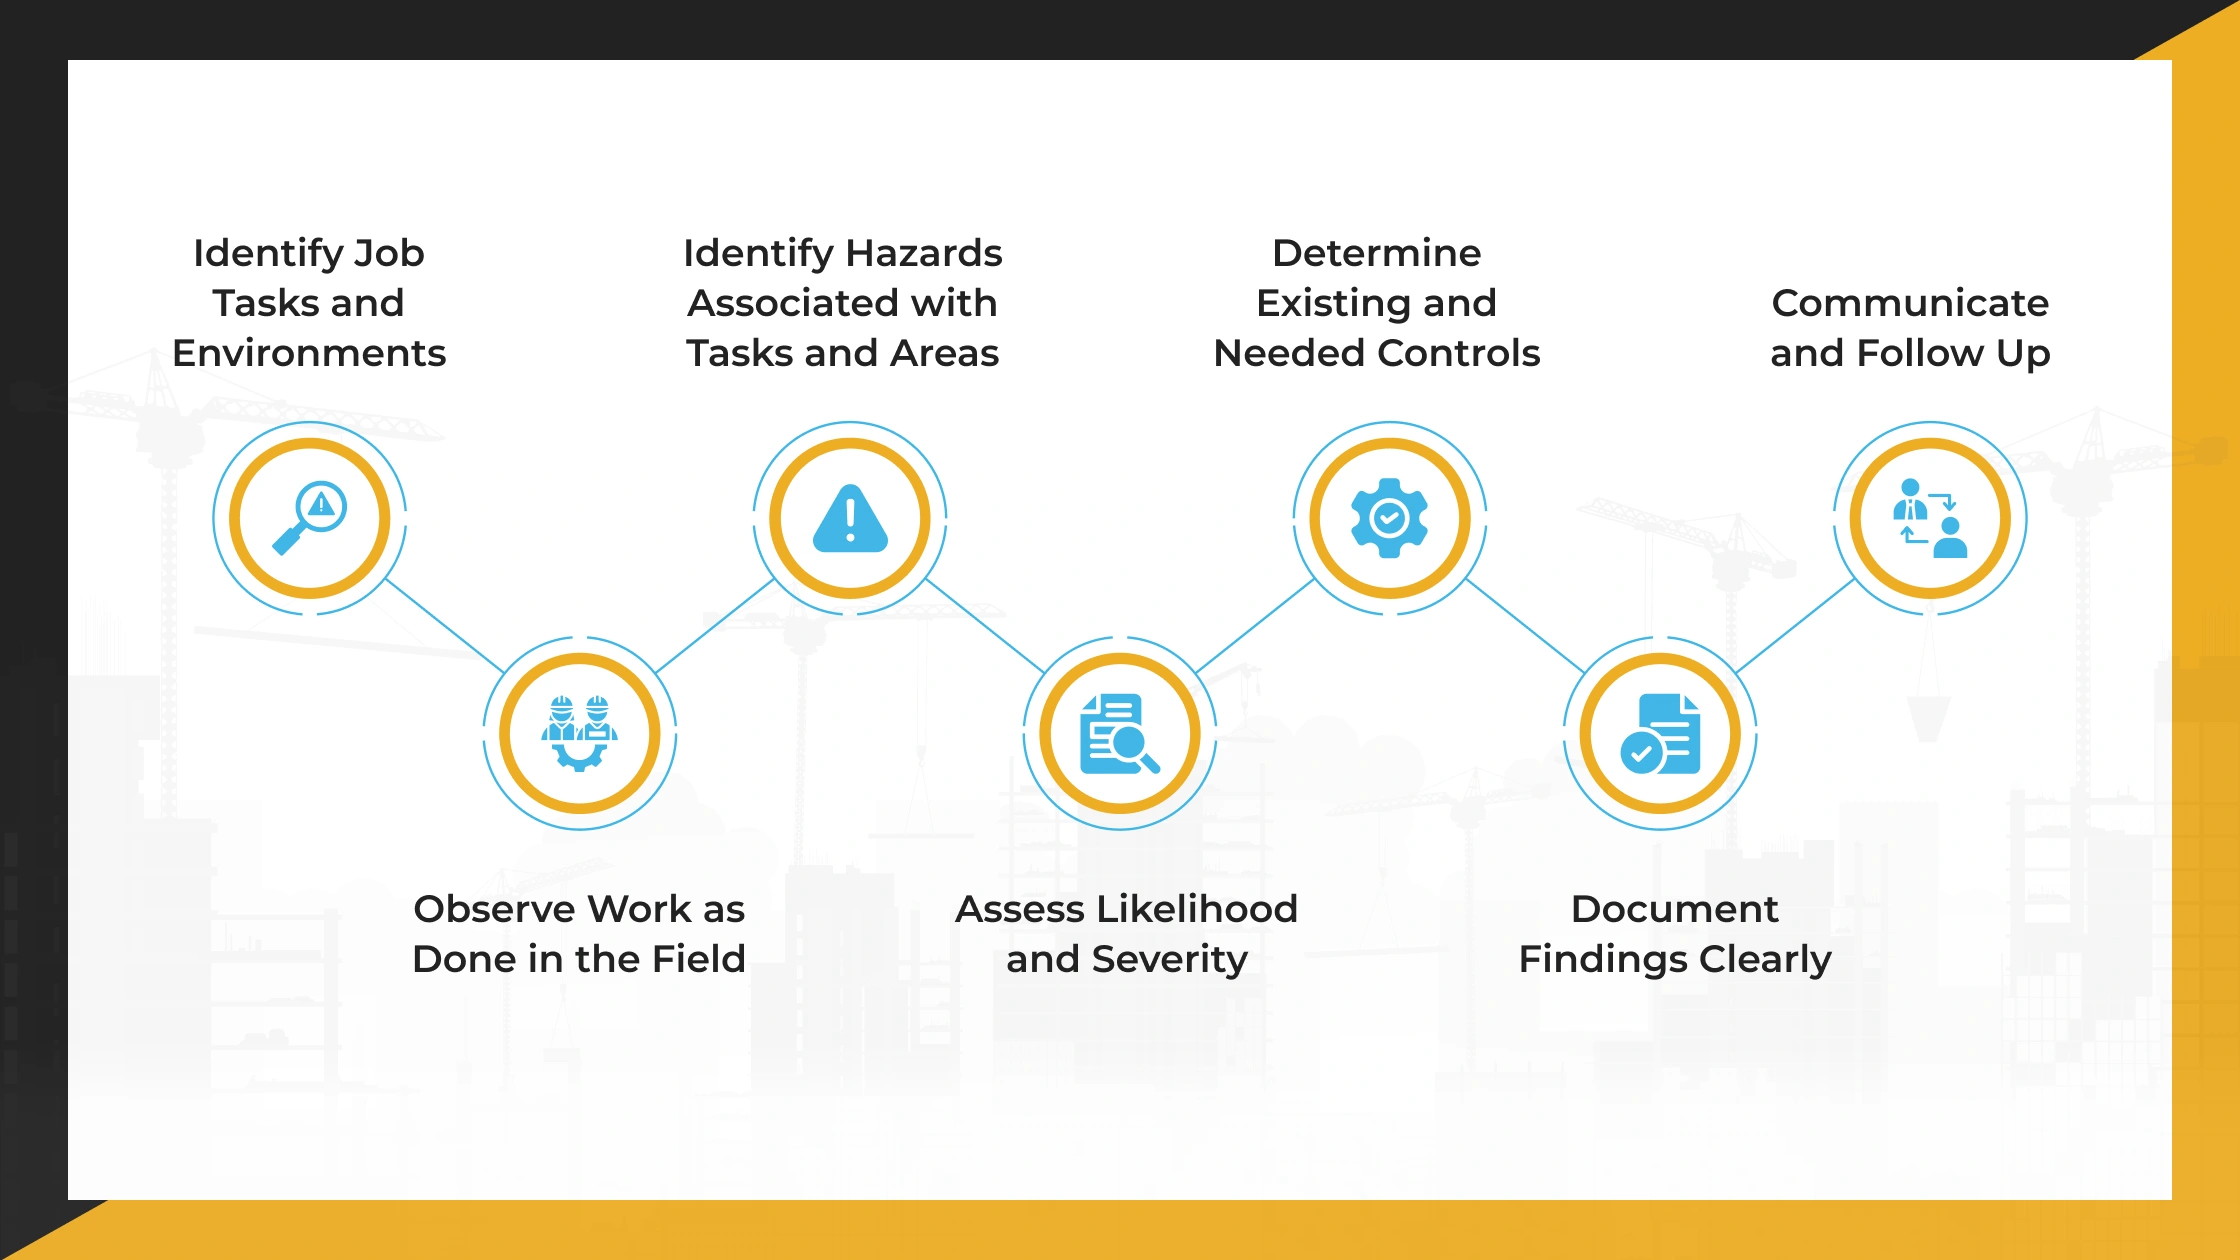
Let’s walk through a practical process to identify hazards, evaluate risk, and put adequate controls in place.
Step 1: Identify Job Tasks and Environments
- Begin with a detailed list of all tasks performed by trade, shift, or phase, including both routine and non-routine work.
- Pull information from job safety analyses (JSAs), standard operating procedures, and field interviews.
- Highlight environments with elevated risk, such as confined spaces, rooftops, energized equipment zones, and areas with moving machinery.
Step 2: Observe Work as Done in the Field
- Join your teams on-site and record how work is actually carried out.
- Pay attention to shortcuts, improvisations, or unexpected interactions with tools or surroundings.
- Procedures are helpful, but it’s what workers actually do in the field that reveals unaddressed hazards.
Step 3: Identify Hazards Associated with Tasks and Areas
- Use your observations, conversations with experienced workers, recent incident logs, and equipment guidance to pinpoint hazards.
- Target all categories, motion injuries, high temperatures, vibration, chemical exposures, fall zones, proximity to mobile equipment, and live energy risks.
Step 4: Assess Likelihood and Severity
- Use a risk matrix to rate each hazard’s likelihood and potential severity.
- Where a single exposure could result in serious injury or fatality, the priority for controls increases. This ensures that limited resources are directed toward the highest-risk issues first.
Step 5: Determine Existing and Needed Controls
- Evaluate current protections in use, such as engineering solutions (e.g., ventilation and barriers), administrative measures (e.g., scheduling and signage), and PPE.
- Note where controls are insufficient or misapplied. Then recommend practical improvements, such as retrofitting guards, updating lock-out/tag-out protocols, or rotating high-exposure tasks.
Step 6: Document Findings Clearly
- Use a structured format that includes task description, hazard details, risk ranking, control measures, responsible personnel, and deadlines.
- Keep records consistent, clear, and audit-ready; you’ll need them for OSHA reviews, client documentation, and insurer verifications.
Step 7: Communicate and Follow Up
- Push your findings out to affected supervisors and crews.
- Confirm that new controls are implemented and understood and that training reflects current risks.
- Build follow-up assessments into your project cadence, especially after equipment changes, staffing shifts, or post-incident reviews.
Common Pitfalls to Avoid During Hazard Assessments
Even experienced teams can fall into well-meaning routines that undercut hazard control efforts. Watch for these common missteps:
- Recycling hazard assessments from prior jobs without verifying site-specific risks.
- Starting and ending with PPE recommendations rather than first addressing engineering or procedural controls.
- Missing interaction risks when subcontractor crews overlap or when staging areas shift.
- Ignoring sporadic tasks, such as maintenance or system testing, that still introduce high-risk conditions
- Not integrating incident reports, close calls, or worker feedback into the assessment updates.
By avoiding these traps, you ensure your hazard controls accurately reflect current work and exposures, not outdated assumptions.
Best Practices for Effective and Current Hazard Assessments
Here is a list of best practices that help ensure hazard assessments remain accurate, actionable, and aligned with real-world jobsite conditions.
Engage a Qualified Expert for Support
In high-risk or fast-moving environments, bringing in trained professionals can provide an objective on-site perspective. This is especially valuable when internal environmental, health, and safety capacity is limited or the scope is complex, helping you strengthen assessments and reduce exposure with greater confidence.
Conduct Objective Site Risk Audits
A structured walkthrough with a neutral lens helps surface hazards that are often missed during routine checks. It also improves consistency across jobsites and supports clearer, more defensible control decisions.
Develop JSAs from Live Tasks
JSAs are most effective when they are built from real-time task observation rather than copied from previous projects. When JSAs reflect actual tools, sequencing, and conditions, crews are far more likely to follow them, and the controls are more likely to work.
Deliver Site-Specific Hazard Training
Training works best when it speaks directly to the hazards crews are seeing on a specific site. Focused hazard recognition training improves awareness, supports supervisor accountability, and reduces the likelihood of workarounds that create new risks.
Maintain OSHA-Ready Documentation
Your documentation should clearly show which hazards were identified, which controls were selected, and how corrective actions were implemented. This kind of verifiable record stands up better during OSHA reviews, audits, and incident investigations.
Review After Incidents and Near Misses
Incidents and near misses are signals that something needs to be tightened. A focused reassessment after these events helps prevent recurrence and shows that your safety program responds in a practical, disciplined way.
Assign Owners and Verify Follow-Through
Every assessment should include responsible parties, deadlines, and a precise closeout method for corrective actions. The ability to show action, not just intent, is what OSHA, insurers, and leadership look for, and it’s what keeps crews protected day to day.
Strengthen the Safety and Compliance of Your Jobsite with Safe T Professionals

At Safe T Professionals, we are dedicated to elevating safety standards through our expert consulting and staffing services. By proactively addressing and preventing safety issues and equipping your workforce with the necessary knowledge and tools, we help create a safer work environment.
Partner with Safe T Professionals to enhance your company’s safety protocols and ensure compliance with industry standards. Whether you are looking to fill safety-specific roles or need expert consultation to mitigate workplace hazards, we are here to help.
Connect with us today!